- Published on
Collecting Emails: The Elegant Way. With MailChimp
- Authors

- Name
- Sam Schooler
I am starting on a new project called Ficte (edit 2016: now defunct) which will be a place to read and write short stories, poems, and other forms of creative writing.
In order to promote Ficte, I needed a splash page with a feature list, and a form to receive emails of people who are interested. I did not really want to go write a large back-end for this, so I went to MailChimp (Disclaimer: Referral), which, to my surprise, was a free service for people who have a small amount of subscribers. I jumped on this, and went through the steps to setup a list. When I got to connecting my list with my splash page, I got a great (sarcasm) copy-and-paste form which when submitted, directed to MailChimp to confirm the subscription. This is something I did not like, so I caved on my idea of no back-end, and wrote a simple Express app (which I will use for the rest of Ficte); This is how I did it.
Setting up an Express app in Node.js
I am going to assume you have Node.js and NPM installed on an Unix machine, if not go install them.
First thing we do, is to get a skeleton Express app up and running. This is done in terminal by first changing the directory to your working directory, then execute the Express skeleton command which will generate the file hierarchy of a basic Express app. We also needed to install the dependencies so change the directory to the skeleton, then install them with NPM.
cd MY_WORKING_DIRECTORY
express express-skeleton
cd express-skeleton
npm install
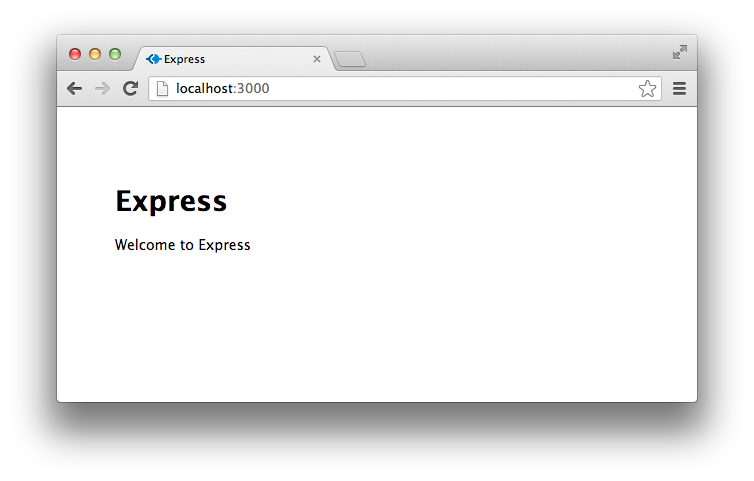
The skeleton does a great job setting up the file hierarchy, however it bloats the files with some unnecessary code to run the example app. The example app that this code creates can be seen on localhost:3000.
node app

Now we can shutdown the node app by pressing CTRL+C. In order to speed up our workflow, I would suggest downloading nodemon which auto refreshes the node app. This can be done via NPM:
npm install -g nodemon
Once it is installed globally, we can run it, and it will auto update when it detects changes.
nodemon app.js
If nodemon does not run, or it cannot be found on your machine. Make sure NPM is in your path; add this snippet to your $PATH (.bashrc file), close and reopen terminal, and try again.
### Node Development

export NODE_PATH="/usr/local/lib/node"
export PATH="/usr/local/bin:/usr/local/sbin:/usr/local/mysql/bin:/usr/local/share/npm/bin:$PATH"
Serving a HTML page with Express routes
Now that the administration stuff is down, we can write code! Before we do that lets figure out what our app needs to do:
- It needs to serve the HTML page which will hold our form
- It needs to receive requests with the email value
- It needs to forward the email address to MailChimp
To serve the HTML page, we need to setup a route. Routes are pretty simple, but first we need to fix some things in app.js. The server launch does not work well so we are replacing the line including http.createServer(app) until the end of the file with:
app.listen(app.get('port'), function() {
console.log("Listening on " + app.get('port'));
});
This fixes issues I had launching the app with Heroku, foreman, and nodemon.
Next, we can create our index page. I prefer to use Jade for a template engine, and that is the default template engine Express uses. To create the index page, open views/index.jade, this will show some default code. Replace that code with this simple html form (converted to Jade):
!!! 5
html(lang='en-us')
head
link(rel='stylesheet', type='text/css', href='stylesheets/style.css')
title Signup for spam.
script(type='text/javascript', src='javascripts/splash.js')
body
h1 We will spam you.
form(action='/s', method='POST')
input.email-text(type='email', name='email', placeholder='[email protected]')
span.email-thanks.hide Now confirm your email
button(type='submit').email-submit GO
// This is for an AJAX loading indicator
.floatingBarsG.hide
.rotateG_01.blockG
.rotateG_02.blockG
.rotateG_03.blockG
.rotateG_04.blockG
.rotateG_05.blockG
.rotateG_06.blockG
.rotateG_07.blockG
.rotateG_08.blockG
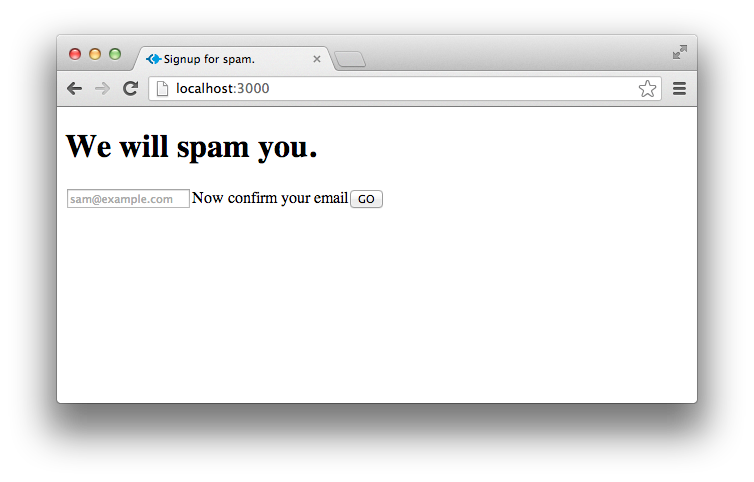
We now have our simple form which can be seen at localhost:3000.

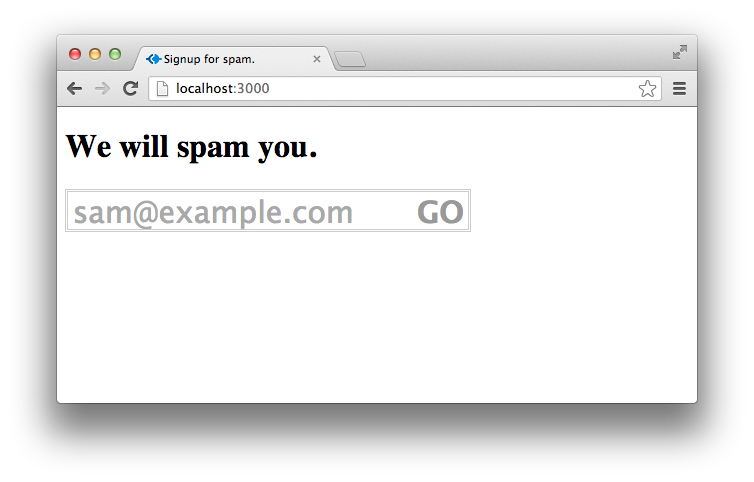
The form is ugly right now, but with a little style in public/stylesheets/style.css, It can look pretty.
.email-text {
border: none;
outline: none;
border: 3px double #CCC;
padding: 2px 55px 0px 5px;
font-size: 30px;
width: 340px;
-webkit-transition: background-color 250ms linear;
-moz-transition: background-color 250ms linear;
-o-transition: background-color 250ms linear;
-ms-transition: background-color 250ms linear;
transition: background-color 250ms linear;
}

.email-submit {
margin-left: -60px;
background: none;
border: none;
font-weight: bold;
font-size: 30px;
color: #999;
}

.email-submit:hover {
color: #666;
}

/_ Loader _/
.floatingBarsG {
position:relative;
width:24px;
height:30px;
margin-left:-30px;
display:inline-block;
}

.blockG {
position:absolute;
background-color:#fff;
width:4px;
height:9px;
-moz-border-radius:4px 4px 0 0;
-moz-transform:scale(0.4);
-moz-animation-name:fadeG;
-moz-animation-duration:.64s;
-moz-animation-iteration-count:infinite;
-moz-animation-direction:linear;
-webkit-border-radius:4px 4px 0 0;
-webkit-transform:scale(0.4);
-webkit-animation-name:fadeG;
-webkit-animation-duration:.64s;
-webkit-animation-iteration-count:infinite;
-webkit-animation-direction:linear;
-ms-border-radius:4px 4px 0 0;
-ms-transform:scale(0.4);
-ms-animation-name:fadeG;
-ms-animation-duration:.64s;
-ms-animation-iteration-count:infinite;
-ms-animation-direction:linear;
-o-border-radius:4px 4px 0 0;
-o-transform:scale(0.4);
-o-animation-name:fadeG;
-o-animation-duration:.64s;
-o-animation-iteration-count:infinite;
-o-animation-direction:linear;
border-radius:4px 4px 0 0;
transform:scale(0.4);
animation-name:fadeG;
animation-duration:.64s;
animation-iteration-count:infinite;
animation-direction:linear;
}

.rotateG_01 {
left:0;
top:11px;
-moz-animation-delay:.24s;
-moz-transform:rotate(-90deg);
-webkit-animation-delay:.24s;
-webkit-transform:rotate(-90deg);
-ms-animation-delay:.24s;
-ms-transform:rotate(-90deg);
-o-animation-delay:.24s;
-o-transform:rotate(-90deg);
animation-delay:.24s;
transform:rotate(-90deg);
}

.rotateG_02 {
left:3px;
top:4px;
-moz-animation-delay:.32s;
-moz-transform:rotate(-45deg);
-webkit-animation-delay:.32s;
-webkit-transform:rotate(-45deg);
-ms-animation-delay:.32s;
-ms-transform:rotate(-45deg);
-o-animation-delay:.32s;
-o-transform:rotate(-45deg);
animation-delay:.32s;
transform:rotate(-45deg);
}

.rotateG_03 {
left:10px;
top:1px;
-moz-animation-delay:.4s;
-moz-transform:rotate(0deg);
-webkit-animation-delay:.4s;
-webkit-transform:rotate(0deg);
-ms-animation-delay:.4s;
-ms-transform:rotate(0deg);
-o-animation-delay:.4s;
-o-transform:rotate(0deg);
animation-delay:.4s;
transform:rotate(0deg);
}

.rotateG_04 {
right:3px;
top:4px;
-moz-animation-delay:.48s;
-moz-transform:rotate(45deg);
-webkit-animation-delay:.48s;
-webkit-transform:rotate(45deg);
-ms-animation-delay:.48s;
-ms-transform:rotate(45deg);
-o-animation-delay:.48s;
-o-transform:rotate(45deg);
animation-delay:.48s;
transform:rotate(45deg);
}

.rotateG_05 {
right:0;
top:11px;
-moz-animation-delay:.56s;
-moz-transform:rotate(90deg);
-webkit-animation-delay:.56s;
-webkit-transform:rotate(90deg);
-ms-animation-delay:.56s;
-ms-transform:rotate(90deg);
-o-animation-delay:.56s;
-o-transform:rotate(90deg);
animation-delay:.56s;
transform:rotate(90deg);
}

.rotateG_06 {
right:3px;
bottom:3px;
-moz-animation-delay:.64s;
-moz-transform:rotate(135deg);
-webkit-animation-delay:.64s;
-webkit-transform:rotate(135deg);
-ms-animation-delay:.64s;
-ms-transform:rotate(135deg);
-o-animation-delay:.64s;
-o-transform:rotate(135deg);
animation-delay:.64s;
transform:rotate(135deg);
}

.rotateG_07 {
bottom:0;
left:10px;
-moz-animation-delay:.72s;
-moz-transform:rotate(180deg);
-webkit-animation-delay:.72s;
-webkit-transform:rotate(180deg);
-ms-animation-delay:.72s;
-ms-transform:rotate(180deg);
-o-animation-delay:.72s;
-o-transform:rotate(180deg);
animation-delay:.72s;
transform:rotate(180deg);
}

.rotateG_08 {
left:3px;
bottom:3px;
-moz-animation-delay:.8s;
-moz-transform:rotate(-135deg);
-webkit-animation-delay:.8s;
-webkit-transform:rotate(-135deg);
-ms-animation-delay:.8s;
-ms-transform:rotate(-135deg);
-o-animation-delay:.8s;
-o-transform:rotate(-135deg);
animation-delay:.8s;
transform:rotate(-135deg);
}

.hide {
display:none;
}

Currently the form does no validation, redirects to the /s page which does not accept requests yet.
Accepting requests and sending data to MailChimp
To accept requests, we need to create a GET route for /s. This is easy, because the skeleton already setup a users route which we can simply rename to s. Replace the line with app.get('/users', user.list);, with:
app.post('/s', chimp.subscribe);
This will crash your node app, so lets fix that quick by including the MailChimp API file. Replace the line that has , user = require('./routes/user') with:
, chimp = require('./routes/chimp')
The node app is probably still not working, so create the file it is trying to reference: routes/chimp.js. This is the file we are going to be using to connect with the MailChimp API. We need to include the MailChimp API, before we can reference it, we need to download it. To do this, go into package.json, and add mailchimp.
{
"name": "application-name",
"version": "0.0.1",
"private": true,
"scripts": {
"start": "node app.js"
},
"dependencies": {
"express": "3.3.4",
"jade": "\*",
"mailchimp": "1.1.0"
}
}
Run npm install again. MailChimp is now in your application.
We need to include the API in routes/chimp.js, and include our API key (API keys can be found in your account settings under extras). This code below includes the MailChimp API, your API key. It creates a MailChimp instance, and checks for errors.
var MailChimpAPI = require('mailchimp').MailChimpAPI;

var apiKey = 'YOUR_API_KEY';

try {
var api = new MailChimpAPI(apiKey, { version : '2.0' });
} catch (error) {
console.log(error.message);
}
Once our API is successfully included, we can write the chimp.subscribe function. This function is a publicly accessible function (The exports variable is public) that allows for a request to be sent with an email URL parameter, which is validated, and sent to MailChimp. For this code to work you need a MailChimp API key, and a List ID from a MailChimp list.
exports.subscribe = function(req, res) {
console.log(req.param('email'));
if (req.param('email')=="" || !/[a-z0-9!#$%&'*+/=?^_`{|}~-]+(?:\.[a-z0-9!#$%&'*+/=?^_`{|}~-]+)_@(?:[a-z0-9](?:[a-z0-9-]_[a-z0-9])?\.)+[a-z0-9](?:[a-z0-9-]*[a-z0-9])?/.test(req.param('email'))) /_ ' _/ {
res.send("error; email : '" + req.param('email') + "';");
} else {
api.call('lists', 'subscribe', { id: "YOUR_LIST_ID", email: { email: req.param('email') } }, function (error, data) {
if (error) {
console.log(error.message);
res.send("error_chimp");
} else {
console.log(JSON.stringify(data));
res.send(JSON.stringify(data)); // Do something with your data!
}
});
}
};
This should fix the errors that made the app crash. The app works at a basic level submitting a form, verifying the email, and sending it to MailChimp. This is great, however you end up on a blank page. To fix this, we can run the request with AJAX, instead of sending the user to the actual /s page.
Submitting a form via AJAX
AJAX forms are quite simple. however they do require a little bit of client-side javascript. We need to create public/javascripts/splash.js. We will write our subscribe function, which validates the submitted email (the regex accepts 99.99% of valid email addresses, which is fine for the average internet user), and sends it via XMLHttpRequest to /s, which sends the email to our list on MailChimp
HTMLElement.prototype.removeClass = function(remove) {
var newClassName = "";
var i;
var classes = this.className.split(" ");
for(i = 0; i < classes.length; i++) {
if(classes[i] !== remove) {
if(i+1 == classes.length)
newClassName += classes[i];
else newClassName += classes[i] + " ";
}
}
this.className = newClassName;
}

var subscribe = function(email) {
var es = document.getElementsByClassName("email-submit");
var fb = document.getElementsByClassName("floatingBarsG");
var eb = document.getElementsByClassName("email-text");
var et = document.getElementsByClassName("email-thanks");
es[0].className += " hide";
fb[0].removeClass("hide");
eb[0].removeClass("error");

if (email=="" || !/[a-z0-9!#$%&'*+/=?^_`{|}~-]+(?:\.[a-z0-9!#$%&'*+/=?^_`{|}~-]+)_@(?:[a-z0-9](?:[a-z0-9-]_[a-z0-9])?\.)+[a-z0-9](?:[a-z0-9-]*[a-z0-9])?/.test(email)) /_ ' _/ {

fb[0].className += " hide";
es[0].removeClass("hide");
eb[0].style.backgroundColor = "#f4bfbf";
setTimeout(function() {eb[0].style.backgroundColor = "#fff";}, 250);

    return;

}
if (window.XMLHttpRequest) {
xmlhttp=new XMLHttpRequest();
}
else {
xmlhttp=new ActiveXObject("Microsoft.XMLHTTP");
}
xmlhttp.onreadystatechange=function()
{
if (xmlhttp.readyState==4 && xmlhttp.status==200)
{
es[0].className += " hide";
fb[0].className += " hide";
eb[0].className += " hide";
et[0].removeClass("hide");
}
}
var params = "email="+email;
xmlhttp.open("POST","s",true);
xmlhttp.setRequestHeader("Content-type", "application/x-www-form-urlencoded");
xmlhttp.send(params);
}
Next, we need to call this when the form is submitted. This is done by capturing the click event of the “GO” button, and also capturing when the Enter key is pressed.
var init = function() {
document.getElementsByClassName("email-text")[0].onkeypress = function(e) {
if(e.keyCode == 13) {
e.preventDefault();
subscribe(e.target.value);
}
}
document.getElementsByClassName("email-submit")[0].onclick = function(e) {
e.preventDefault();
subscribe(e.target.parentNode.parentNode.getElementsByClassName("email-text")[0].value);
}
}
if(window.addEventListener){
window.addEventListener('load',init,false);
} else {
window.attachEvent('onload',init);
}
That should pretty much do it. We now have a Node.js app which serves a form that takes emails, validates them, and submits them back to the app. The app then submits the email to MailChimp to be placed in a list.